
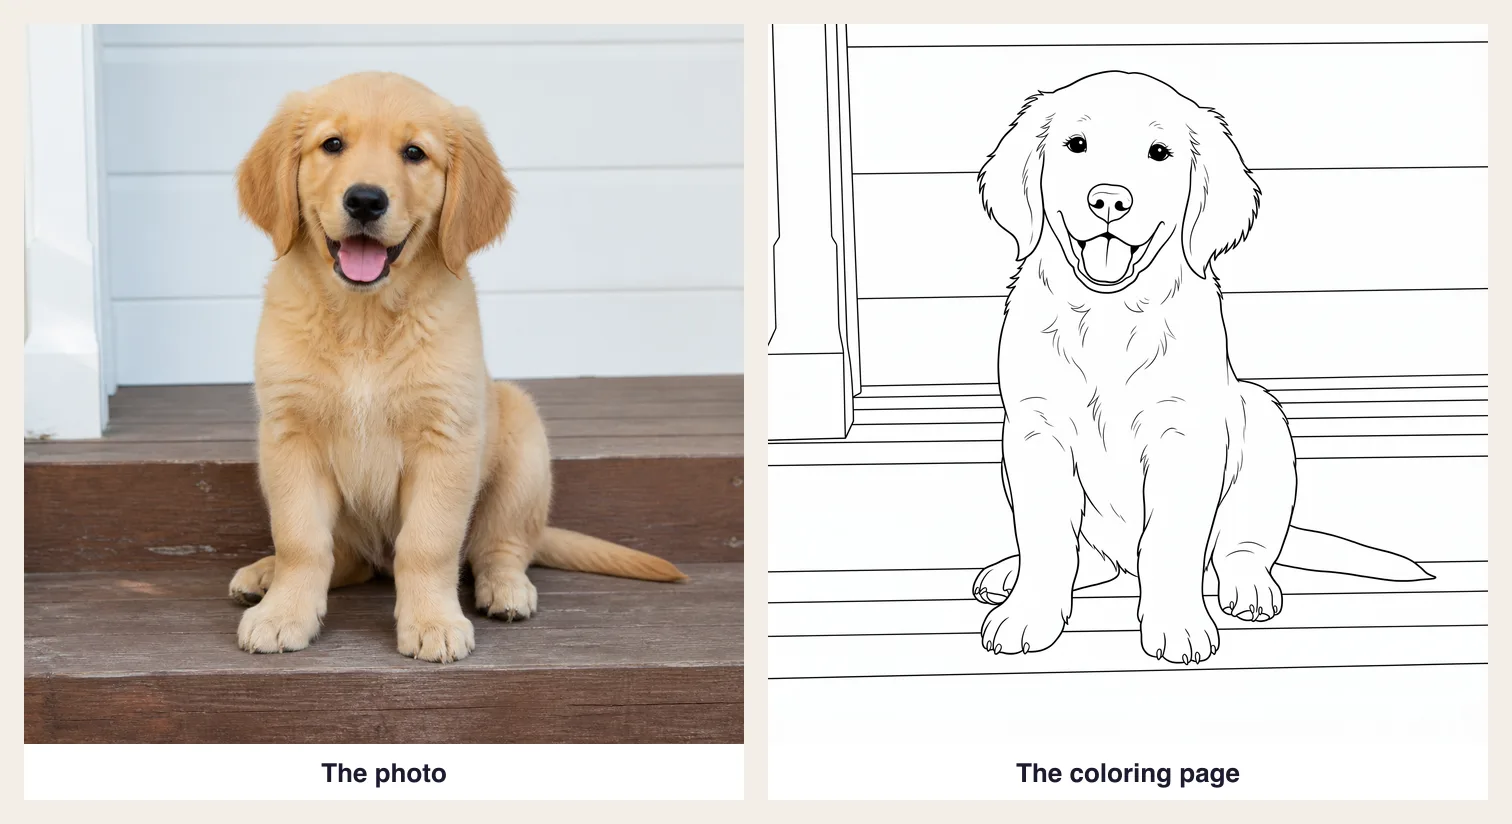
A photo of your dog, your kids, your house or last summer's beach trip can become a coloring page in about ten minutes. The method you should use depends on one question most guides skip: do you want the photo itself as line art, or the person in it drawn into new pictures?
This guide covers both, including where each method struggles. (The example photos are AI-generated, so no real family's pictures are used.)
Which method should you use?
| Method | Best for | Time | Cost | What you get |
|---|---|---|---|---|
| 1. Photo editor | An exact copy of the photo, for older kids and adults | 10 minutes | Nothing (Photopea or GIMP) | Detailed line art of the whole photo. Needs some cleanup |
| 2. Trace by hand | Simple, bold pages for young children | 20 to 40 minutes | Paper and a black pen | Clean outlines, exactly as simple as you draw them |
| 3. AI photo converter | One quick page | About a minute | Often a few pages at no cost, then paid | Varies by tool and by photo |
| 4. Your child or pet in new scenes | A whole coloring book starring them | A few minutes | From 1 credit a page on InkChamps | Not the original photo: a cartoon of them in pages you describe |
If you want the photo as it is, use method 1, 2 or 3. If you want your daughter as an astronaut on the moon, use method 4.
Before you start: pick the right photo
The photo matters more than the tool. Every method below turns differences in light and dark into lines, so a photo that is easy to read gives a page that is easy to color.
- A plain background. This is the biggest single difference. A wall, the sky or a sheet behind the subject leaves white space; grass, carpet, wood and crowds turn into hundreds of tiny specks.
- Even light, no hard shadows. Strong shadows become solid black patches that a child can't color.
- One clear subject, close up. Crop so the face or the pet fills most of the frame. Small faces lose their features.
- Sharp, not blurry. A blurry edge gives a broken, fuzzy line.
- Big enough to print. For a full Letter or A4 page at print quality, aim for at least 2,000 pixels on the long side. Most phone photos are far bigger than that.
If your favorite photo has a busy background, remove it first. Most phone galleries can now lift a subject off its background with a long press, and photo editors have a "remove background" tool. Paste the subject onto plain white, then carry on.
Method 1: Turn a photo into line art with a photo editor
This is the classic "pencil sketch" technique, done in a free photo editor. Photopea runs in your browser with no install and uses the same menus as Photoshop. GIMP is a free desktop app. The steps are the same in both, and in Photoshop.
Step 1: Open the photo and make it black and white
Open your photo. In Photopea or Photoshop choose Image → Adjustments → Desaturate. In GIMP choose Colors → Desaturate → Desaturate.
Step 2: Duplicate the layer and invert it
Duplicate the layer (Layer → Duplicate Layer). With the copy selected, invert it: Image → Adjustments → Invert in Photopea, Colors → Invert in GIMP. The copy now looks like a photo negative.
Step 3: Set the copy to Color Dodge and blur it
In the Layers panel, change the copy's blend mode to Color Dodge (called Dodge in GIMP). The picture turns almost completely white. Now blur the copy: Filter → Blur → Gaussian Blur (Filters → Blur → Gaussian Blur in GIMP). Lines appear as you raise the radius. Somewhere between 5 and 15 pixels usually works: a bigger radius gives darker, thicker lines.
You now have a pencil sketch. It is pretty, but too faint to color: the grey lines disappear when printed and crayons skate over them.
Step 4: Turn the sketch into solid black lines
Merge everything into one layer (Layer → Flatten Image in Photopea, Image → Flatten Image in GIMP), then apply Image → Adjustments → Threshold (Colors → Threshold in GIMP). Every pixel becomes pure black or pure white. Drag the slider until the outlines are solid and the background is clean: toward the light end for more lines, toward the dark end for fewer.
Step 5: Clean up and save
Take a white brush or the eraser and remove stray specks, stubble in the background and any black patches too small to color. Leave the outlines. Then save as PNG (File → Export As), which keeps lines sharp.
What to expect: this method copies everything in the photo, so fur, hair and fabric come out as lots of short strokes. That suits teens and adults who enjoy detailed pages. For a four-year-old it is too busy: use method 2, or trace over the main outlines of your result with a thick black marker after printing.
Method 2: Trace the photo by hand
The oldest method still gives the cleanest page for young children, because you decide which lines matter.
- Print the photo pale. Print it in black and white, at lower contrast if your printer allows, so it doesn't fight with your pen.
- Put it under clean paper. Tape both to a sunny window, or use a light pad. Tracing paper on top works too.
- Trace only the outlines. Use a black felt-tip or fineliner. Trace the outer shape, eyes, nose, mouth, ears, hands and the main folds of clothing. Skip texture: fur, hair strands, grass and wood grain.
- Thicken the outside line. Go over the outer edge of the subject a second time. A thick outline gives small children a clear "wall" to color up to.
- Scan or photograph it to print more copies, or color the original.
Aim for something like the "simple outline" example near the top of this guide: one thick line around the body, a face, paws, and big empty shapes. Twenty minutes of tracing gives a page a toddler can actually color, and you decide every line.
Method 3: Use an AI photo-to-coloring-page converter
Online converters, including one in Canva and several dedicated coloring-page sites, do methods 1 and 2 for you: upload a photo, get line art back in seconds. The better ones redraw the photo as clean outlines instead of copying every speck. The coloring page in the picture at the top of this guide is what a good one returns: the wood grain became a few clean boards and the fur became a handful of strokes.
Before you upload, check three things:
- Privacy. Read what the site does with uploaded photos, especially photos of children. Look for how long they are kept and whether they are used to train models.
- Resolution. Some tools return a small image that prints soft or blocky at full page size. Check the download size before you rely on it.
- What it changes. AI converters redraw, so faces can drift. Compare the result with the photo before you print twenty copies for a birthday party.
Method 4: Put your child or pet into new coloring pages
Methods 1 to 3 give you the photo you already have, in lines. Often what a child really wants is to be in the picture: riding the dinosaur, flying the rocket, winning the race. That needs a drawing, not a trace.
This is what the personalized coloring book in InkChamps does:
- Add who is in the book. In the coloring book or story coloring book creator, the "Who is in your book?" step takes a photo and a name for each character. Add up to five: siblings, grandparents, the dog.
- Describe what happens. For example: "Maya explores the moon and makes friends with a robot." Choose the age and the number of pages.
- Download the book. Every page is drawn as black-and-white line art with your child in it, as a cartoon character who keeps the same hair, glasses and clothes from page to page. A story coloring book also writes a line of story under each picture. Redraw any page you want changed, then download one print-ready PDF.
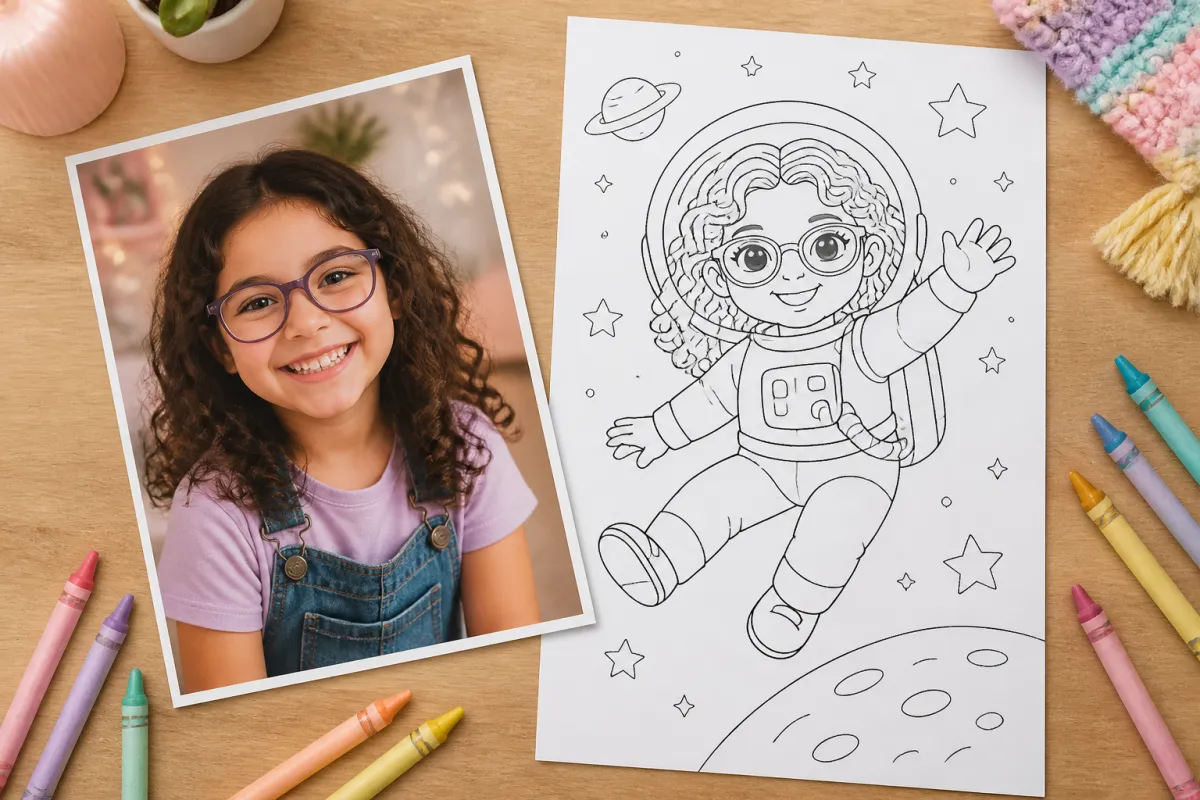
Be clear about what this is and isn't. It is not a tracing of your photo: your child is redrawn as a cartoon in new scenes, and the photo itself never appears in the book. It is made for people and pets. For a photo of a place, such as your house or a holiday view, use methods 1 to 3. A plain coloring page costs 1 credit and a story coloring page 2 credits, and adding a photo does not change that. See pricing.
Print it so it colors well
- Fit to page. In the print dialog choose "Fit" or "Scale to fit" so the edges aren't cut off, and set the paper to Letter or A4.
- Print in black only. Choose grayscale or "black ink only". Pure black lines print crisper and save your color ink.
- Use heavier paper for markers. Ordinary printer paper is fine for crayons and colored pencils. Markers bleed through it, so use heavier paper or light cardstock and print on one side only.
- Keep the file. Save the finished PNG or PDF. When the page is colored in, print it again.
Match the detail to the age
| Age | What works | Best method |
|---|---|---|
| 2 to 4 | Big shapes, one thick outline, almost no inner detail | Trace by hand (method 2) |
| 5 to 8 | Clear outlines with a few inner details: eyes, pockets, a collar | Method 2, method 3, or method 1 traced over with a marker |
| 9 and up, adults | Fine detail, fur and texture are part of the fun | Photo editor (method 1) |
Whose photo can you use?
- Photos you took are yours to use however you like.
- Professional and school photos usually belong to the photographer, even when the person in them is your child. Printing a coloring page for your family is a different thing from selling it; if you want to sell or share pages made from a photo someone else took, ask the photographer first.
- Other people's children should only go on a page with their parent's OK, especially if you'll share it online.
- Selling coloring pages made from photos? Only use photos you took or have the rights to, and leave out logos, brands and famous characters that appear in the background.
Frequently asked questions
How do I turn a picture into a coloring page for free?
Use a free photo editor such as Photopea (in your browser) or GIMP. Make the photo black and white, duplicate the layer, invert the copy, set it to Color Dodge and blur it, then flatten and apply Threshold to get solid black lines. Clean up stray specks and save as PNG. The full steps are in method 1 above.
What is the best photo to make a coloring page from?
A sharp photo of one subject, close up, in even light, against a plain background. A busy background such as grass, carpet or wood turns into speckles, and hard shadows turn into black patches.
Can I turn a photo of my child into a coloring page?
Yes. To keep the photo as it is, use a photo editor or trace it by hand. To put your child into new scenes, such as an astronaut or a superhero, a personalized coloring book like the one in InkChamps draws them from their photo onto every page.
Why does my coloring page have so many specks and dots?
The photo has texture or a busy background, and the conversion turns every small change in brightness into a mark. Use a photo with a plain background, raise the blur radius, move the Threshold slider toward fewer lines, and erase what is left with a white brush.
Can I make a whole coloring book from photos?
Yes. Convert each photo with any method, then put the pages in one PDF to print. If you want a book of new scenes starring one child or pet rather than copies of existing photos, InkChamps makes the whole book as one print-ready PDF from a photo and a short description.
Can I sell coloring pages made from photos?
Only from photos you took or have the rights to, and only if nothing in them belongs to someone else, such as a brand logo or a famous character. School and studio photos usually belong to the photographer.
Put your child or pet on every page
Add their photo and name, describe an adventure, and download a whole coloring book that stars them.
See the personalized coloring book